Autonomous Path Following
Example: https://youtube.com/shorts/_V6LtC7hawg?feature=share
Setting Up Pathplanner
Run
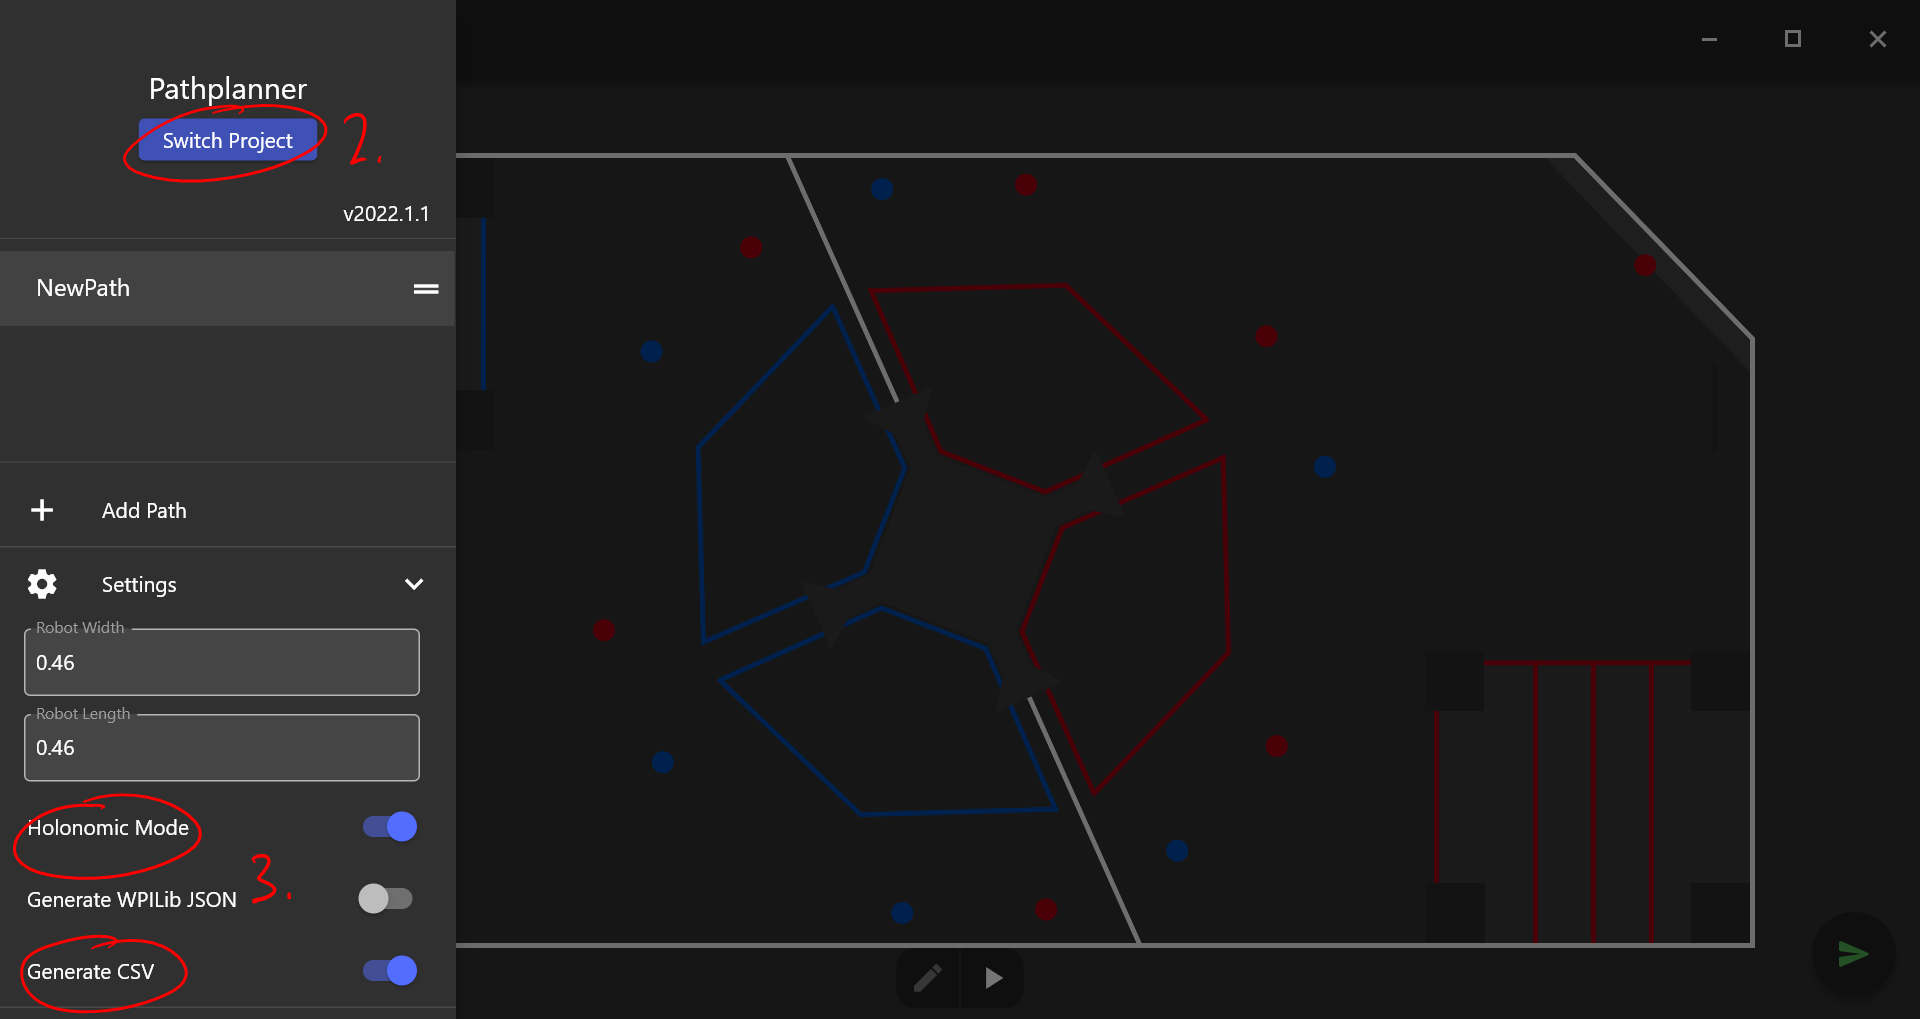
pathplanner.exefrom the previously downloaded pathplanner folder download guide hereGo to the menu and click the “Switch Project” button. Choose the folder of your project
Go to settings, and turn on “Holonomic Mode” and “Generate CSV”
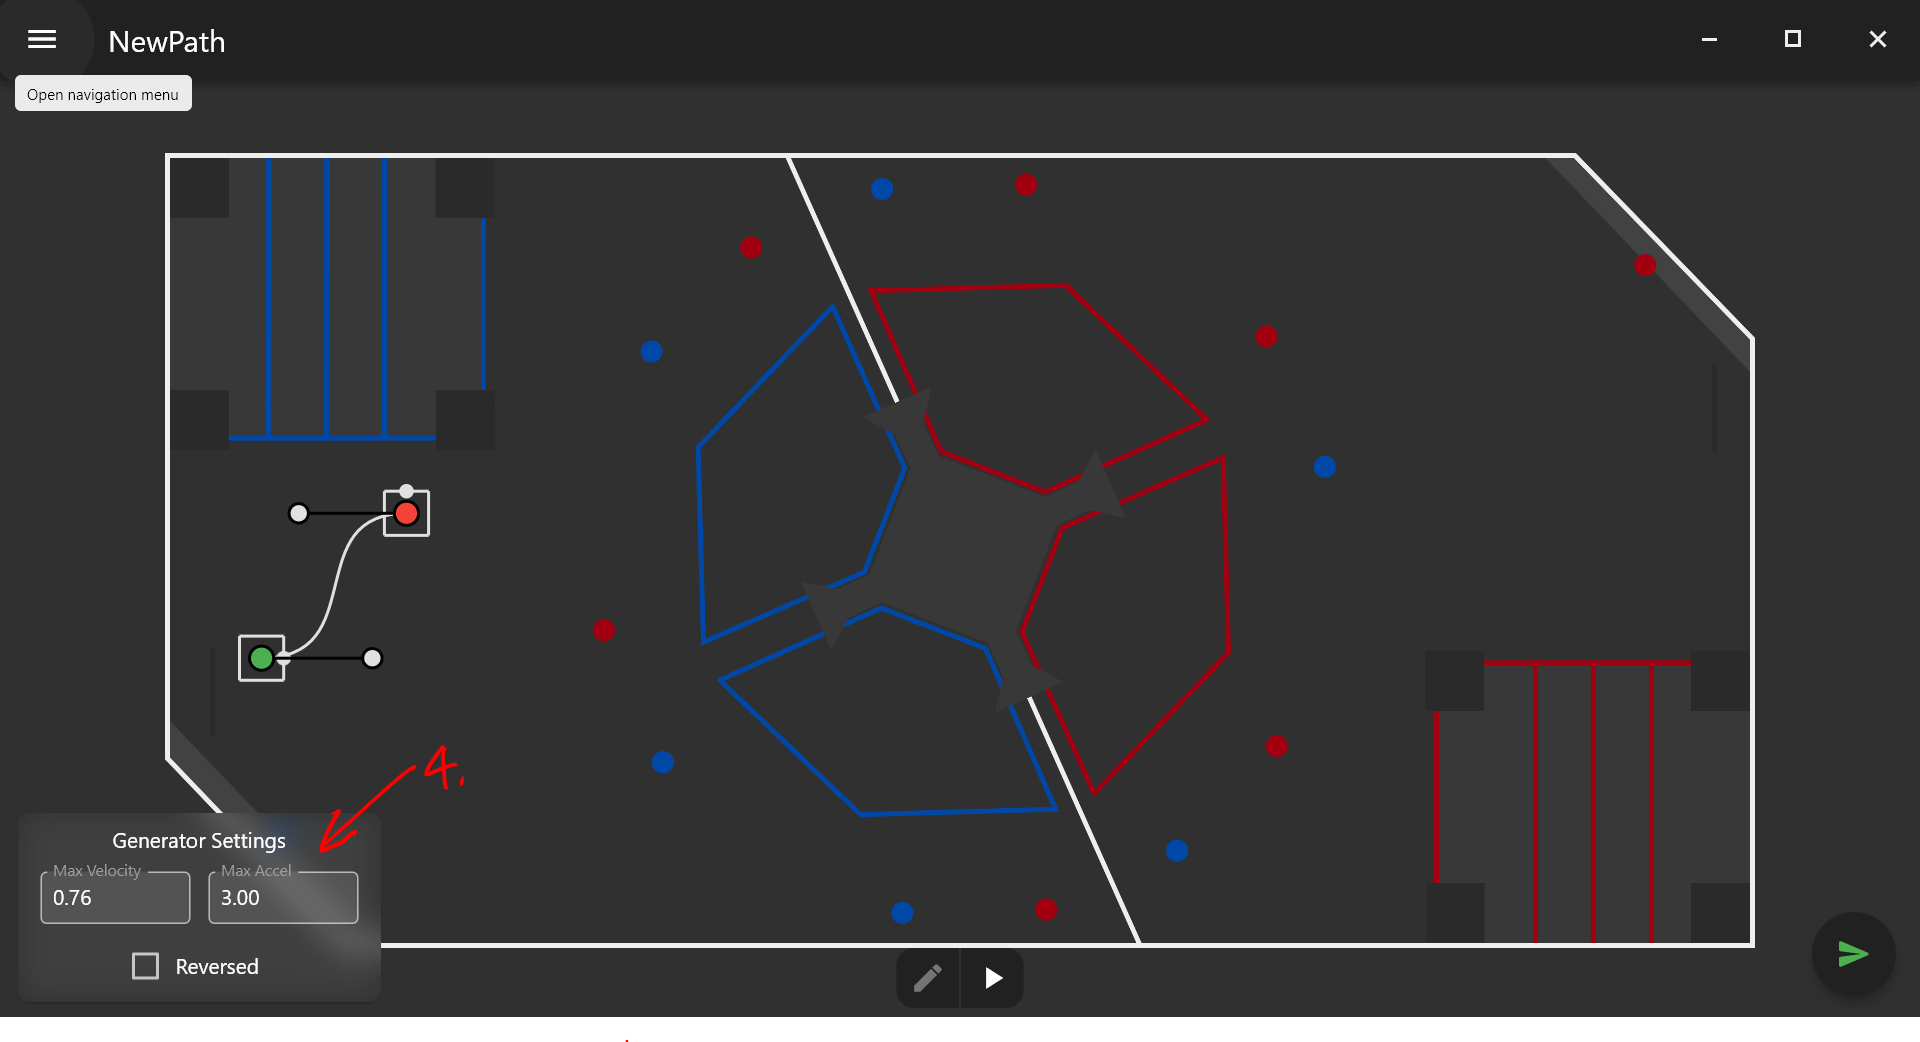
Outside of the menu, customize the “Generator Settings” with appropriate max velocites and max accelerations
Generating the Trajectory
Draw your desired path in pathplanner (yes, I know, it’s a FRC field; just treat it as a normal VEX field with meters as its units… paths are relative anyways so it doesn’t really matter)
Run
convertor.exe(downloaded previously) by running./convertorin the terminal, located in the root of your projectInput the name of your path into the terminal when prompted
The generated trajectory will be copied to your clipboard. You can paste the generated trajectory into your project.
If all goes well, you should end up with something like this in your clipboard:
TimedTrajectory TRAJECTORY_NAME = {
{ 0.0, 0.0, 0.0, 0.0},
{ 0.09546349735777332, 0.01836722730983333, 9.648426277155382e-05, 0.36},
{ 0.13455982283961315, 0.051983191444950824, 0.000631472862023017, 0.72},
{ 0.1642595449156504, 0.08842596962282846, 0.0016073473094173115, 1.08},
{ 0.18904986189801176, 0.1260008448867695, 0.0030294971278352094, 1.44},
{ 0.21067589573536047, 0.16403984120698523, 0.004898353906373502, 1.8},
{ 0.2300362863012862, 0.2022085110479, 0.007212444922835768, 2.16},
...
};
Following the Trajectory
controller->setTarget(TRAJECTORY_NAME, true)will make the chassis follow the trajectory (please see the previous article on Autonomous Translation for more details about Async behavior)
Here is the full example code:
 1/** Create Okapi OdomChassisControler - used as a base for HolonomicLib's chassis controller */
 2std::shared_ptr<OdomChassisController> chassis = ChassisControllerBuilder()
 3    .withMotors(
 4        1,  // Top left
 5        -2, // Top right (reversed)
 6        -3, // Bottom right (reversed)
 7        4   // Bottom left
 8    )
 9    .withSensors(
10        ADIEncoder{'A', 'B'}, // left encoder in ADI ports A & B
11        ADIEncoder{'C', 'D', true},  // right encoder in ADI ports C & D (reversed)
12        ADIEncoder{'E', 'F'}  // middle encoder in ADI ports E & F
13    )
14    // specify the tracking wheels diameter (2.75 in), track (7 in), and TPR (360)
15    // specify the middle encoder distance (1 in) and diameter (2.75 in)
16    .withOdometry({{2.75_in, 7_in, 1_in, 2.75_in}, quadEncoderTPR})
17    .buildOdometry();
18
19/** Create HolonomicLib AsyncHolonomicChassisController - controls chassis movement */
20std::shared_ptr<AsyncHolonomicChassisController> controller =
21  AsyncHolonomicChassisControllerBuilder(chassis)
22    // PID gains (must be tuned for your robot)
23    .withDistGains(
24        {0.05, 0.0, 0.00065, 0.0} // Translation gains
25    )
26    .withTurnGains(
27        {0.05, 0.0, 0.00065, 0.0} // Turn gains
28    )
29    .build();
30
31/** Opcontrol: moves chassis according to Pathplanner path */
32void opcontrol() {
33    // Pathplanner path: generated with Pathplanner
34    // Converted to TimedTrajectory via convertor.exe
35    TimedTrajectory path = {...};
36
37    controller->setTarget(path, true);
38}
More information regarding the HolonomicLib API can be found here